Get CreativeParty Time

It’s been a long time since Paige and I have gathered the time and energy to put on another #getsocialworkshop, and in all honesty we were a bit nervous this time around. We were working with a new space, a lot of new sponsors, and both of us have shifted our focus so vastly over the past couple of years we didn’t really know what to expect.

But for the third time, we were so pleasantly surprised with how it all came together.

The workshop this time around was packed, despite having expanded to a larger space, and everyone came from totally different backgrounds, which made the range of information we had to discuss so much more dynamic. Over incredible pink waffle breakfast sandwiches from Burger Pawty, fresh blooms by Wild North Flowers, and hot tea from Teapigs, attendees spread out around the space, snapping photos on coloured backdrops with glittery fun props. I think it’s safe to say that even when time was up, no one was really ready to go back to reality and head home!

Paige and I feel so incredibly lucky to have the chance to take part in such an inspiring and creative community, and it’s days like this past Sunday that really remind us why we do what we do. Thanks so much to everyone who joined us!

dsc_4722

dsc_4762

dsc_5107

dsc_4947

dsc_4886

dsc_5018

dsc_4789

dsc_4797

dsc_4912

dsc_5076


Special thanks to our incredible sponsors //

Burger Pawty
Teapigs
CONVEY
Wild North Flowers
Cake Beauty
Flow Water
I Love Puffy Love Marshmallows
Fancy Pufs
Richer Poorer
Bite Beauty
Ban.do
Nude Bee Honey
Rosehound Apparel

Get Creative

The holiday season can get kind of hectic, and DIY projects are a great way to put aside time to simply slow down and take a deep breath. We’ll be sharing all sorts of fun recipes and projects leading up to Christmas, but we decided to kick off this busy time with something extra calming. We all need a bit more calm in this wild world, right?

For this week’s installment of the #pastelcraftclub we teamed up with Julie from Province Apothecary. I had the pleasure of attending an outdoor essential oil blending workshop with Julie this past summer, and I was so enchanted by the magic of her knowledge that I immediately know we needed to share some of it here. Paige quickly agreed, a long-time fan of Province Apothecary as well, and here we are.

Part natural medicine, part olfactory, and in my opinion a little bit like witchcraft, the power of blending pure essential oils is pretty amazing, and we’re thrilled to have Julie here today sharing one of her secret formulas – Keep Calm!

Scroll down for Julie’s DIY

dsc_4628

dsc_4630

dsc_4653

dsc_4649

As an aromatherapist I love reaching for essential oils to help calm my body and mind during times of stress. My favourite way to apply them is in a therapeutic roll on.

By using essential oils in your daily life you can help diminish stress, relieve depression, ease physical pain, promote alternateness, heal skin issues like acne and much more. The properties of essential oils, when used properly, can promote general well-being and self-connection. Essential oils are so easy to use and can be incorporated into your daily routine: they can be used in a bath, during a massage, or in your daily skincare regime. The beautiful thing about essential oils is that they work on a subtle level- sometimes one drop is enough.

Terms to know:
Essential oils are natural aromatic compounds found in the seeds, bark, stems, roots, flowers, and other parts of plants.

Aromatherapy: The therapeutic use of plant-derived, aromatic essential oils to promote physical and psychological well-being. Your skin is the largest organ of the body and absorbs essential oils easily.

| ESSENTIAL OILS FOR calming the body + mind |

BERGAMOT naturally relaxes and uplifts. It’s invigorating scent invites joy and laughter in one’s space, working as a natural antidepressant. It relieves tension to unfold a natural harmony.

CEDAR WOOD naturally strengthens + clarifies. Its light, woodsy scent has a calming and soothing effect on the mind and is of great help in conditions associated with anxiety. It also acts a general tonic, easing conditions of a respiratory nature.
CLARY SAGE naturally calming to the nervous system. An effective sleep aid. Great for reducing anxiety/asthma, reduces muscle tension, PMS. Aphrodisiac.

FRANKINCENSE naturally settles and composes. Its scent eases worry and rejuvenates the mind. Antispasmodic, anti-inflammatory, calming/relaxing, anti-fungal/antibacterial/antiseptic, decongests open airway. Relieves tension (in all systems), stress, anxiety. Has been used for meditation..

ROMAN CHAMOMILE naturally calms. It’s a powerfully peaceful oil, bring inner harmony and reducing irritability, anxiety and worry.


LAVENDER calms nervousness and relieves depression. Its antispasmodic, antibacterial, antiseptic properties make it nature’s #1 First Aid oil. Use lavender oil to naturally relieve dryness, cracked skin, eczema, and wounds. It stimulates the growth of healthy new cells, making it effective in healing the skin and reducing scars.

dsc_4662

dsc_4688

dsc_4666

| EQUIPMENT YOU WILL NEED |
•1 ml vials or beakers to blend your scent
• Essential oils of choice
• Coffee beans to help with olfactory fatigue
• Roll on container (10 ml roll on), 10 ml base oil + beaker
• Labels for blending and for finished product

| BLENDING YOUR SCENT |
BLEND DILUTIONS 10 ml : 1% – 2 drops, 3%- 6 drops, 5% – 10 drops, 10% – 20 drops

1. Choose the essential oils and % of blend you would like to make, 1-5 oils is best for therapeutic roll ons

2.. Add one drop of each oil to the 1 ml vial or beaker and smell your blend after each drop, record the # of drops and slowly add more of the oils you would like more of.

3. Shake or stir your blend. Smell your blend and add more oils or keep as it is. Count out the number of drops your have used. This will be your final recipe.

4.. Once you have discussed your final blend with Julie, slowly count out the final number of drops into your 10 ml vial. Add your carrier oil of choice to the eos, put the cap on and shake.

ALWAYS: Document every single drop. Add drops one at a time and check scent. When formulating is complete, add EO blend to carrier base. Store your blend in a bottle out of the light. Label your formula clearly with the date.

DIRECTIONS: Apply oil to your wrists, temples, and back of neck (into your hairline) and let the essential oils absorb into the skin. For immediate results, place scent directly under your nose and breath deeply. Can be used as many times as needed throughout the day.

Get Creative

Happy Hallo-weekend! Are all your costumes ready to go? Have you stocked up on candy? Are you looking for a spooky (or sweet) craft?

Well, we don’t have any tricks, but we do have a special Halloween treat for the #PastelCraftClub this week. We teamed up with Michelle from Big Ass Piñata to bring you the sweetest little pastel Candy Corn Miñata (aka mini piñata) ever. The best part? It’s so simple to make it’s almost like casting a magic spell!

Michelle is a master of tissue and cardboard, and we’ve been constantly impressed by her piñata magic for months, so it was really wonderful to watch her get down to work in the studio. Turns out with the right supplies and a strong vision piñata making isn’t as scary as we thought it would be! Are you ready to impress your costume party guests with the sweetest candy decor?

Scroll down for Michelle’s full DIY instructions!

pcc_pinata-1

pcc_pinata-2

pcc_pinata-3

pcc_pinata-5

Mini Candycorn Piñatas

1. Start with a fun, cute idea for your mini piñata. Today we are making pastel candycorn!

2. Grab a pencil and draw the shape for your mini piñata onto a piece of thin cardboard. If the cardboard is too thick, it will be difficult to cut later.

3. Cut out the shape using scissors or an xacto knife. Trace your shape and cut again, so you have a front and back for your mini. Finally, cut a long, thin strip of cardboard to wrap around the whole shape of your mini.

4. Using masking tape, begin assembling your mini piñata by wrapping the long strip of cardboard around your shape and taping edges to the back of your mini. Once you have taped the back and sides of your mini, you can place the front on top and tape down. I call this the “ice cream sandwich” method!

5. Use your xacto knife or scissors to cut create a little door for your candy! You can make a pull tab that can be used to open it later or simply cut a flap into the side of your mini.

6. Time to decorate! Grab some tissue paper (I like to use streamers!) And use your scissors to cut and create a fringe effect.

7. Using glue or a glue stick, begin attaching your fringe at the base of your mini and layering upwards until you have covered your piece. If you cover your little candy door, that’s ok!

8. Surprise a friend with your mini piñata and have them pull the tab to release the surprise inside. Is it candy? Chocolate? Jewelry ? Who knows!

pcc_pinata-7

pcc_pinata-12

pcc_pinata-13

Happy Halloween!

Dear DiaryParty Time

Guess what? The #getsocialworkshop is finally back, with more information and fun than ever before! Paige and I have both gained so much knowledge in everything from opening an online shop to formulating a strong visual strategy for your brand, and we can’t wait to share what we’ve learned with our newest students (alongside sweet treats and fully loaded gift bags as per usual of course!)

Whether you’re a blogger or business owner we can’t wait to teach you about photos, promos, partnerships, and everything else that comes with the wild world of social media and digital marketing on Sunday November 13th!

Tickets won’t be on sale until Monday (link will be here – act quick as we always sell out!) but for now you can see snippets from our last classes here, here and here!

Get CreativeSips, Sweets & Snacks

When the weather turns cold here in Toronto (and trust us, Winter IS coming) there are only a few places where one can feel really truly warm. In all honesty, most icy days Paige and I have a hard time finding a good reason to even go outside, daydreaming about Hawaii, Mexico, or other tropical getaways instead. That said, we’ll never say no to a staycation at Miss Thing’s.

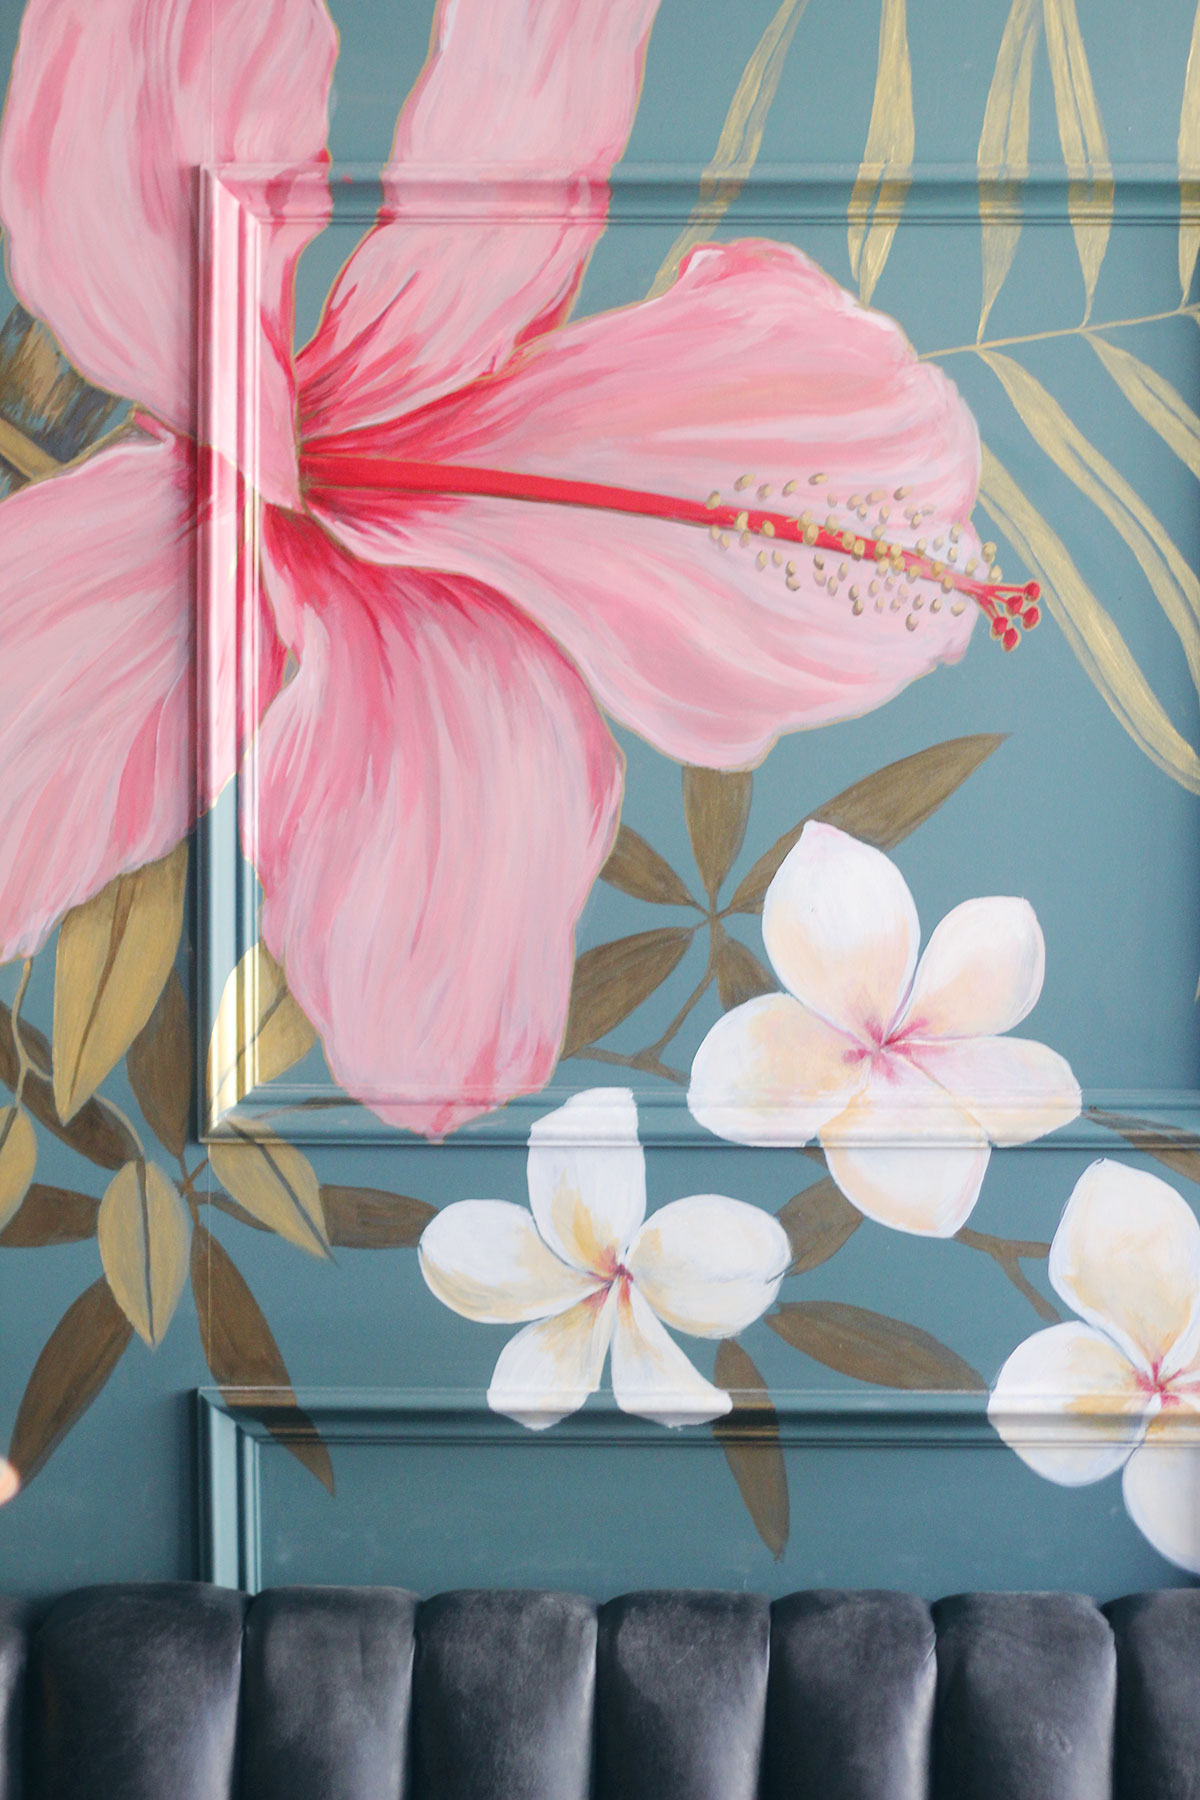
Miss Things is relatively new to the Toronto scene, but they instantly became a favourite for us the moment they opened. With a menu that includes incredible seafood, delicious shrimp Po’Bao (just try them) and a crazy good pineapple fried rice served IN a pineapple, the food couldn’t be more our style. Coupled with gleaming gold decor details and tropical prints galore, there’s really no place quite like it in the city, and it’s always a welcome escape from the daily grind.

But wait, the best is yet to come. We haven’t even mentioned the tiki cocktails yet.

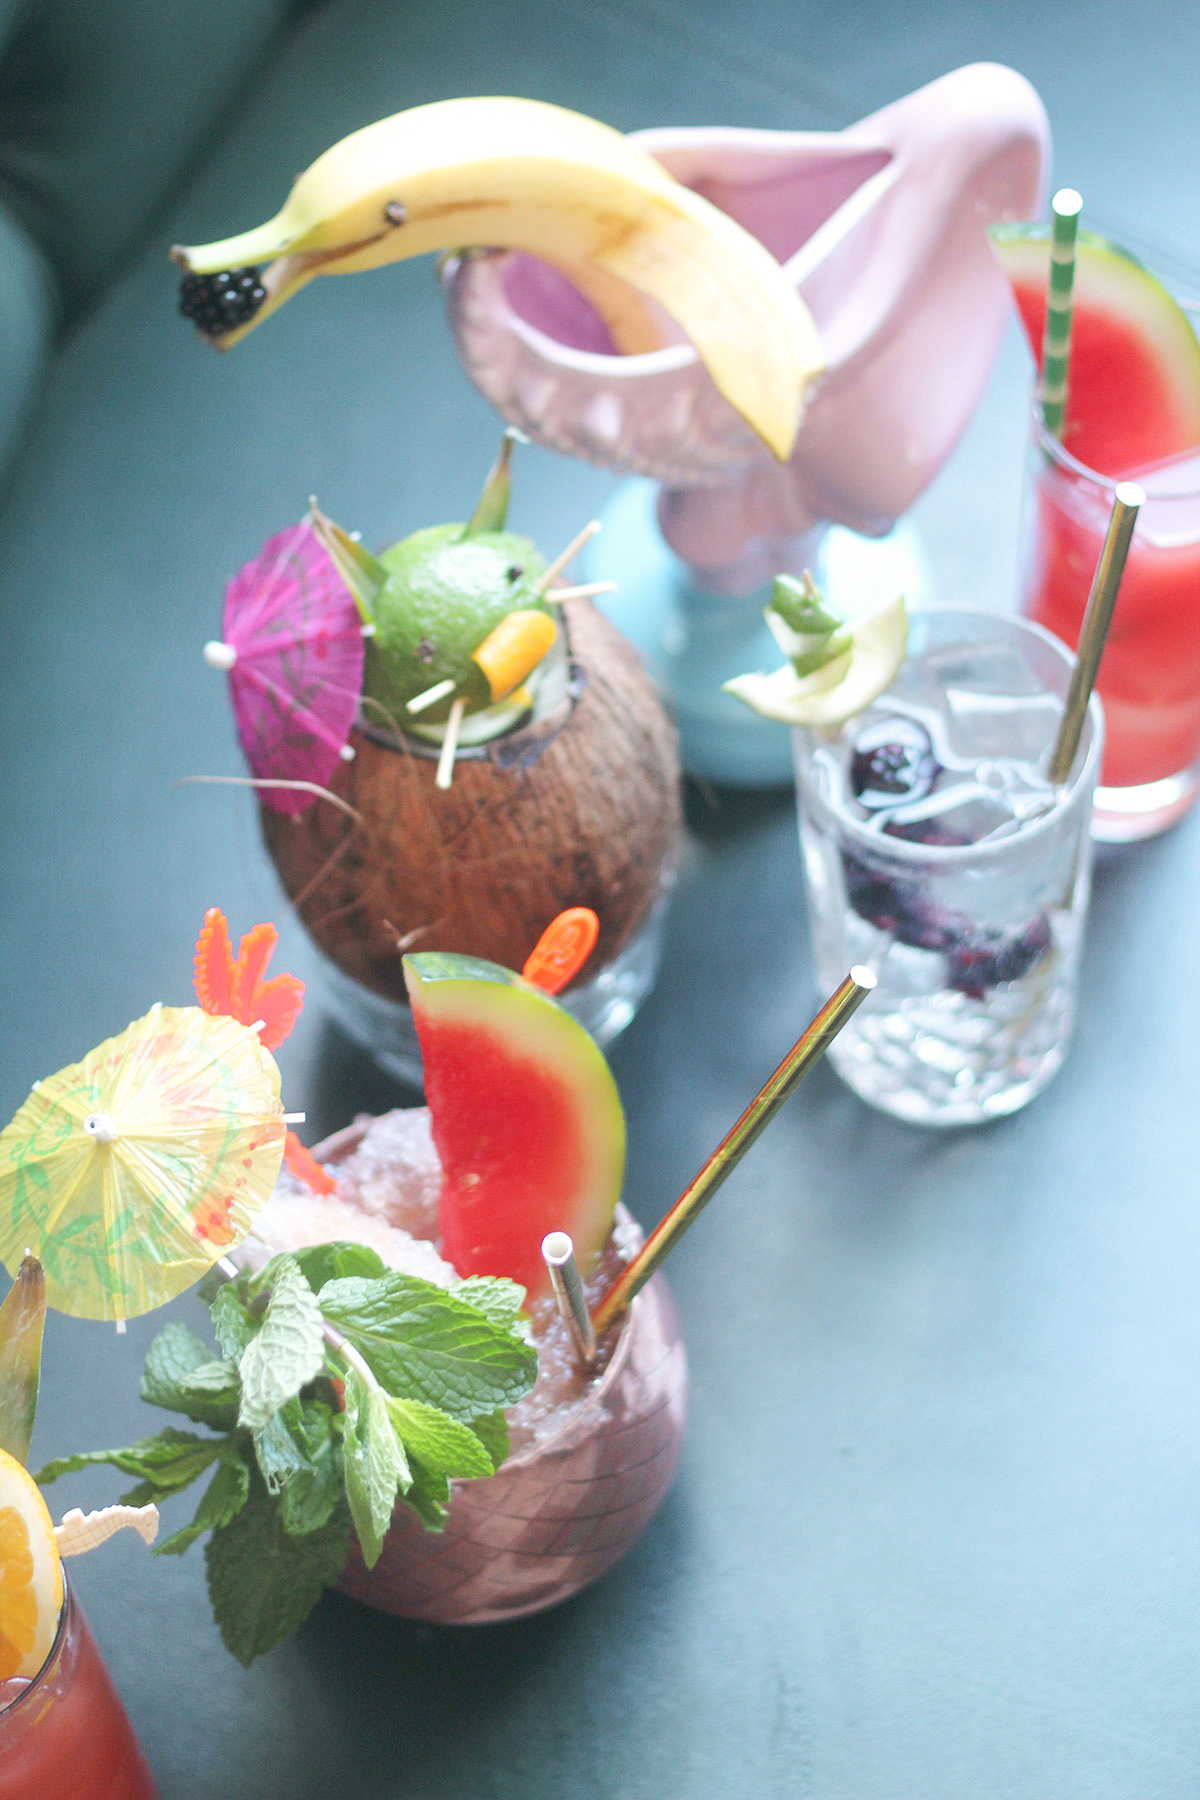
Toronto has a lot of great cocktail bars, yes, but this place truly tops them all in the tropical tiki department. Everything from crazy cups to elaborate garnishes have clearly been carefully thought through, and we almost never manage to order just one per visit purely out of curiosity for how each one looks!

With winter sneaking up on us more and more, Paige and I have been craving a taste of the tropics more than ever, so we reached out to Miss Thing’s and asked if they’d share some of their magical boozy wisdom. A few weeks later we found ourselves behind the bar shaking up tiki classics and building banana dolphins! It was the most fun (and slightly tipsy if we’re being honest) Pastel Craft Club yet, and we learned SO much too.

Scroll down for an epic “Our Tai” cocktail recipe, and instructions for how to master some favourite tiki garnishes!

pcc_missthings-11

pcc_missthings-6

pcc_missthings-8

pcc_missthings-15

pcc_missthings-13

pcc_missthings-4

The Mai-Tai, a classic Tiki Cocktail //

Funnily enough, the birth of the Mai-Tai, a classic tiki drink, was in California. Back in the mid-1940s, Cali bars started to adapt the tiki craze. There are two gentleman Victor “Trader Vic” Bergeron, and Donn “Don the Beachcomber”, whom claim to have created this particular drink:

The name is said to have been created when Trader Vic’s two friends from Tahiti came to visit. He wanted to make a special drink just for them, and when they tried his creation they said “Mai Tai roa ae” which means “Out of this world, the best!”

Our Mai Tai at Miss thing’s is more like Trader Vic’s original Recipe.

1 oz White Rum (We use Selvarey White)
1 oz Dark Rum (We like it with Mount Gay Eclipse)
1 oz Cointreau
.75 oz Orgeat – almond syrup (if not homemade we like to use Monin Syrup)
2 oz Fresh Lime Juice

*We also turn it into a minimum two-person drink and rename it the “Our Tai”, which is twice the amount of ingredients as the Mai-Tai.

Garnishes //

A garnish compliments the cocktail, making it look more pleasing both to the eye and to one’s Instagram followers. If a drink has lime juice, it’s usually garnished with lime, or a lime wheel might be added for extra flavour. But for tiki cocktails there’s usually a creative tiki mug involved, and garnishes get a bit more showy, like pineapple fronds, orange wheels, cherries or edible flowers. The cool thing about tiki is that the garnish adds a creative aspect and it can really be of whatever you think of. At Miss Thing’s we garnish our drinks with simple but fun ideas, such as…
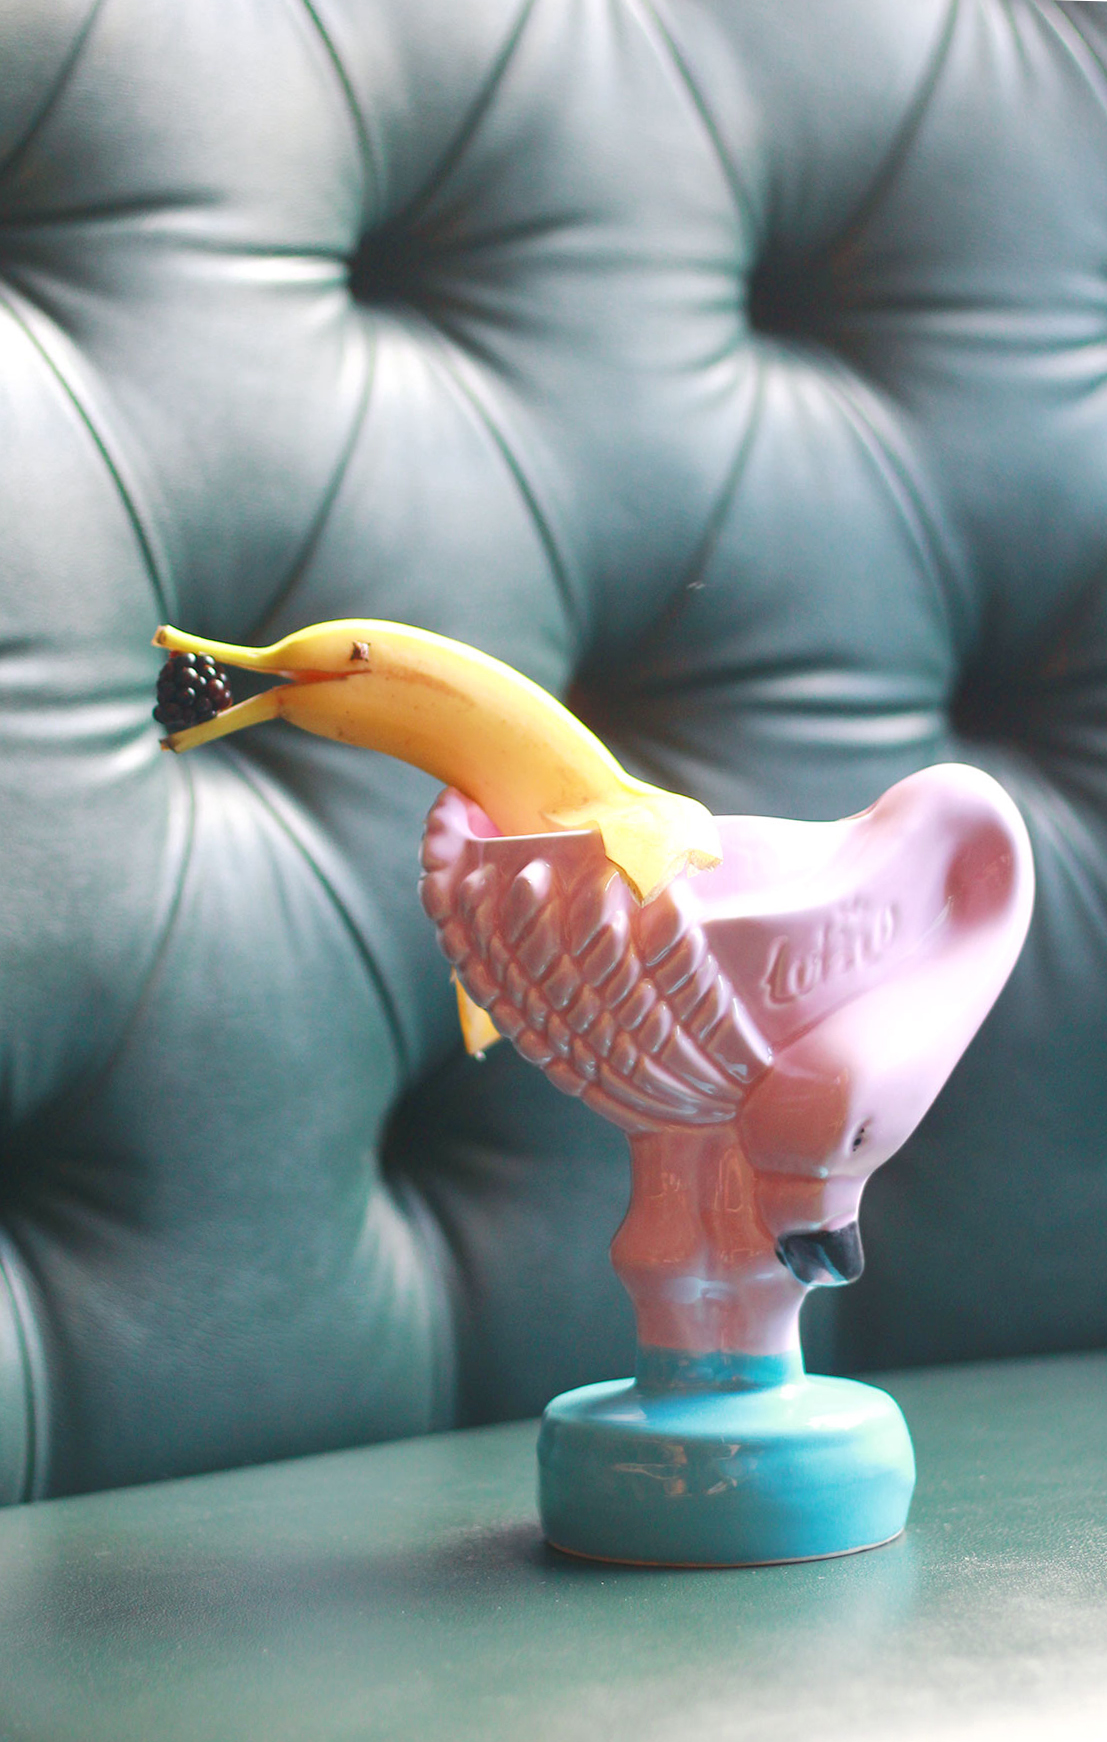
Banana Dolphin //

1 Whole banana
2 cloves
optional- 1 blackberry

tools:
knife

slice off an inch of the bottom part of the banana. You can angle the slice so that the banana still has a point at the open end.

From the open end, slice the peel upward about an inch on either side of the peel. This adds fins to the banana.

Move to the top of the banana and create a mouth for the dolphin, this is done by slicing the middle of the part that connects the banana to the rest of the “bunch”.

Add the Cloves as eyes on either side of the “mouth”. You can put the banana dolphin in your drink, peel up the “fins” so they rest on both sides of the glass. Add the blackberry to the mouth of the dolphin as a little snack if you’d like!

Lime Sailboat //

1 lime
1 cocktail skewer (ex. bamboo stick, toothpick)

Tools:
peeler
knife

Zest one side of the lime, but be careful- you want to have two good rinds to use as the sails.

Cut the other side in half, then in thirds. Take one third of the lime and remove the flesh. This is the base or the hull of your boat.

Flip it around so it has the peel facing up, take your skewer and stick it in the centre of the rind and pull it through, leaving a centimetre at the bottom.

Now grab your rinds and cut them in half. Choose one side, then choose one piece that is slightly smaller than the other.

Fold the larger piece in half, rind side out, and stick it on to the skewer, repeat that step with the smaller piece. Those are the sails, try to space them out a bit.

For a cool added effect, simmer the boat in a small saucepan with 2 ounces of water and 3 ounces of sugar on medium heat. Remove after 5 minutes and sprinkle with sugar. You have just candied your sailboat!

pcc_missthings-5

pcc_missthings-7

pcc_missthings-14

Frozen Watermelon Slices //

mini-watermelon
house made flavoured simple syrup
vodka (can also be flavoured)

tools:
knife
parchment paper
Vac-pac (bag or a container with a lid)

At the bar we have a machine in our kitchen that vacuum seals our infusions which helps speed up time, but you can do this at home with a simple airtight container.

Slice up your mini watermelon and place the slices in a vac pac with the vodka and our house-made syrup. Seal it and let it sit in a fridge for 6 hours, then place the slices on parchment paper in a container and leave them in the freezer overnight. Frozen slices can be used the next day and they stay fresh for up to a week.

If you don’t have access to a vacuum sealer, simply put the watermelon slices (1 layer) in a container and fill it with vodka and syrup for about a day, then wrap and freeze. Make sure to keep everything chilled for this process!

In the end the frozen watermelon acts as an extra component to chill the drink and won’t dilute the flavour. Plus once the drink is finished the watermelon will have defrosted and you can eat it for an extra kick!

*Note: make sure you keep the recipe ratio at 1/2oz vodka and 1oz syrup per watermelon slice or they won’t freeze!